SCCM
2012 Installation
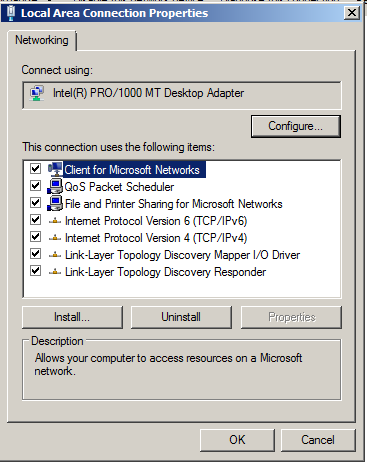
TCP/IP :
change the IP address to
static

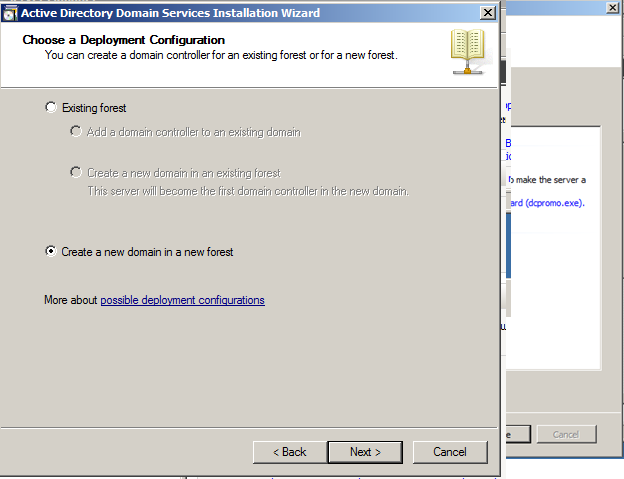
Domain installation:
Add Active directory domain
services role


Go to run type dcpromo.exe


Machine added in domain

DHCP Server


Add DHCP server role


Adding Scope:
Go to administrative tools -->DHCP


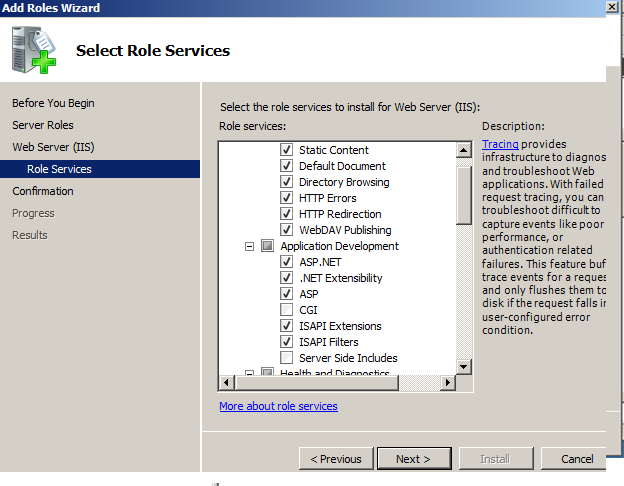
IIS Server
Installation:
Go to Roles-->Web server


Select below services in IIS


Adding BITS &
Remote Differential Compression:
Go to server manager --> Add features


WebDAV Settings:
Open IIS Manager


Open the C:\Windows\System32\inetsrv\config\schema folder,
in that folder right click on the WEBDAV_schema and Edit
And
change the below configuration
<element name="properties">
<attribute
name="allowAnonymousPropfind" type="bool"
defaultValue="false"
/>
<attribute
name="allowInfinitePropfindDepth" type="bool"
defaultValue="false"
/>
<attribute
name="allowCustomProperties" type="bool"
defaultValue="true"
/>
And changed them to:
<element
name="properties">
<attribute
name="allowAnonymousPropfind" type="bool"
defaultValue="true"
/>
<attribute
name="allowInfinitePropfindDepth" type="bool"
defaultValue="true"
/>
<attribute
name="allowCustomProperties" type="bool"
defaultValue="false"
/>
And save
the file
Click on Default Web Site and click on Basic
Settings.


The C:\inetpub
is waiting for the application pool
identity is valid Click on Close


In IIS Manager, in the Connections
pane, expand the Sites node in the tree, then click the Default Web
Site. Double-click the Authentication feature.

When
the Authentication feature opens, Change the Windows Authentication
from Disable
to Enabled.
Do the same for Basic Authentication from Disable to Enabled and Digest Authentication from Disable
to Enabled
(Note: You can use Basic Authentication with WebDAV,
but the WebDAV redirector will only use Basic authentication with SSL
connections.)
Click
on Enable


Then click the Default Web Site.
Double-click the Directory Browsing
feature.
Directory Browsing:

Click on the Enable
Schema Extension:
Run-->extadsch

In log file - Successfully extended the active directory
schema

Adding System
Container:
Open adsiedit.msc

Connect to server


In Values type System
Management & Click Next.


Donet Framework 4:


SQL 2008
Installation:


SQL Service Pack 3:


SQL Patch
Installation:


Open SQL server Management Console


Open SQL Server Configuration Manager and check TCP is
enabled


Restart services or reboot after the installation

SCCM 2012
Installation:
Run Splash


Successfully installed SCCM 2012

No comments:
Post a Comment